Writing Complete Apps in Electron
Electron has been a common go-to framework for developing desktop applications, and in that time there have been many unexpected nuances. Many developers would find these issues, and then abruptly move away from Electron because of it. So we will discuss everything you need to write your apps in Electron, as well as show you some resources and tricks to go with it.
Electron in a Nutshell
Electron is a framework built on the Chrome V8 engine, so your apps in Electron run on a stripped down Chrome browser of sorts. With it you have the ability to build a web-app frontend , but also allowed to add to the lower-level with C++. Electron is quite common, and you probably used a handful of Electron applications without even knowing it. Visual Studio Code, Basecamp, and Discord, all use Electron as their framework. Basecamp and Discord use Electron to access the main app remotely, where VS Code hosts holds code locally.
Electron is fairly cut and dry, but issues start to arise in the execution. Your apps consist of a main process, and a renderer process for each viewable window. Both of these processes have differing functionality, as well as limitations in regards to performance. Until we discuss it later, the most important concept to remember is that Electron has two separate processes for handling your code.
From Development to Production
When you first build Electron for production you can often find a lot of parts of the app breaking. With that, it is important to understand that your app is compressed within a single file in the asar format. Within this file you will find an environment similar to your development build environment.
Handling Case Sensitive Files
When working with multiple platforms, you need to keep track of the nuances of each platform, and running into issues with casing is common. Before you even start writing your project, it’s best to decide how you plan to handle file and folder naming. Once you make your decision, still with it, otherwise making changes in larger projects can be a nightmare.
With case-sensitive platforms, you will need to reference every file by the exact casing of your file imports. Also keep in mind that Git sees files as case-sensitive on these platforms. So when you change the casing of a file you end up with a record for two different files within git.
To get around this issue:
- change the file name back to the previous casing
- move the file to a directory outside the repository
- commit the file removal change
- move the file back to its original folder and with the new casing
- commit the file addition
This is what’s needed to change the casing of a file in git, but end up losing access to history associated with original file.
Building for Production
It should be understood that testing Electron features on production builds require much more than simply using the production environment variable. While the production environment is fine for testing the bundle, it will not allow you to test the build. Many features can break in this process, and you could end up driving yourself crazy trying to make them work. Most of problems arise due to referenced external files, since they are accessed within the asar file.
File Handling in Production
One concept that throws people off, is the concept of the Electron resource files. The resources folder is used for files like images, docs, and any other file that cannot be packed directly into the asar file. Electron provides a direct resourcePath object in the process object, with the only catch being that this path can only be accessed in production. This means your app needs to dynamically change the resource path based on the build environment.
When using an icon, you will find the Electron docs recommend setting the icon using an absolute path. Realistically, you always want relative paths. An absolute path can be set dynamically to access icons, but it will not take long to find that this method takes more effort to work in Linux. Instead we can simply stick with relative paths.
The following conditional path setter works great for handling resources:

This path can be used to access all external files we need access to within the app package. For a better example, you view your app’s scaffolding by unpacking the asar, and looking at the file layout.
$ asar extract dist/<platform>/<app name>/app.asar unpacked/Electron Specific Files in the Asar
No matter your situation, there may be times when altering data in the asar could be beneficial. The issue that you will find, is that Linux doesn’t support the ability to write to files within to asar during runtime. You will have the ability to read, but not write to files.
One way around this particular problem is to use the local user temp directory. This solution introduces a new issue, as placement of the app file in OSX and Windows portable can cause this path to fail. It’s best to avoid the need to alter files, otherwise the temp directory is your best solution.
Frontend Styling
When you want to create a multi-platform application with Electron, you expect the application to look the same across each OS. Unfortunately this isn’t always the case. You will find that all platforms will display the frontend differently. For the most part it all comes down to the platform specific UI elements, elements like scrollbars and fonts throw off the size. The frameless option for OSX will cause similar differences as well.
This can all be annoying, but the reality is that you can work around it with CSS. Hiding the scrollbars will fix many common UI differences in Windows/Linux. For frameless, dynamically altering the app height in the BrowserWindow object will match the height across all platforms. Otherwise it was all about making sure CSS styling was reset to be as uniform as possible, though at first glance you can always see the font differences. As long as you use static sizes with pixel counts, or REM counts, you will be fine.
Adding Icons
Having that default electron app icon replaced with our own icon, is the badge of honor showing it is an app separate from Electron itself. We want to drop our icon images into our resource folder. In OSX and Linux we reference these files when initializing the BrowserWindow object. For Windows, an ICO icon can simply be placed in the resource folder. Tray icons will need to be placed there or an images resource folder. Once placed, referencing that relative path when initialing your Tray object.
Icon Styling
Using a single icon for each platform is a pretty bad idea, as that icon will look ok on one platform, but horrible on another. For OSX or Linux, you will want to follow the style guidelines so your icon looks like it belongs there. Following Apple’s styling guidelines for icons is a great way to cover OSX and Linux app icons. Use electron-icon-maker as a way to create all the sizes you need. With Windows, you need a square icon with minimal padding for it to look decent.
Local and Remote Apps in Electron
How you host your application determines the support allowed in your application. This is mostly due to security concerns that could put your users in danger.
NodeJS Support
Locally hosted applications will have access to the NodeJS modules. This can give a wider availability of options when writing your application. There are some structural concerns that come with this compatibility (see Selective Automation). When writing a fully-fledged local application, NodeJS can be a great addition of functionality.
To enable node integration within Electron, add the nodeIntegration webPreference to each BrowserWindow object initialized within Electron:
  new BrowserWindow(Object.assign({
    webPreferences: {
      devTools: process.env.NODE_ENV === 'development',
      nodeIntegration: true
    },
  }, browserWindowOpts))
Hosting Remote Applications
A great advantages to serving remote applications, is moving away from the platform restriction. Apps like Basecamp use Electron as a client to a remote app handled with Ruby on Rails.
There are still several security concerns to be aware of. The most important concern is avoiding remote code execution. In you haven’t already, it is extremely important that you become familiar with the Electron Security documentation.
Note: When using the Webpack Development Server, you will often find security warnings from Electron. When loading a local file in production, you can often ignore these warnings.
Remote Code Execution
To avoid issues with remote applications, one important concept is to use the sandbox feature. Code execution is then isolated within the application itself. Next is the requirement of the remote host using SSL encryption. Last, avoid NodeJS Integration with your remote applications. Leaving NodeJS enabled can give an attacker the ability to interact with the local system, a feature you certainly do not want to offer.
When using NodeJS, you can use a preload script to inject your own local API, limited to the modules you need, instead of the entire API. it’s also worth checking out the contextIsolation option when using preload, which separates the Electron API from the window and document scope.
Prepping Your Bundles for Production
When writing an Electron app, it should be understood that you are theoretically writing a full-stack application. One part is the one the user interacts with (Frontend), and the other is the Electron Main Process script (Backend).
JavaScript Support
Chrome V8 does not fully support ES6/ESNext, so you may need to write the Electron Main Process script with ES5 module imports/exports. You can setup an Electron-based Webpack setup to get around this. If the majority of your application is in the main process, this may be ideal. If not, you may find yourself rarely working in the main process, making this sort of setup redundant.
The renderer process will almost always justify a Webpack setup, and most Electron boilerplates have this sort of development setup. Since the Electron renderer process is specifically for displaying the app, it isn’t made for extremely intensive processes. A lot of the heavier processes may work better in the main process, or with the less ldeal Web Workers.
When bundling for production, a separate webpack configuration for production is good practice. A good practice is to set production to strip out all of the comments, mangle, and optimize. The Terser Webpack Plugin is a perfect addition to accomplish this.
Code Obfuscation
If you don’t plan to share your application’s source code, you may want a way to protect your IP while still meeting open-source requirements. Obfuscation is a way to make the code unreadable, making reverse-engineering the only option for anyone wanting to reuse your concept.
Using the Webpack Obfuscator plugin will obfuscate your code making it production-ready. If you look at a obfuscated bundle, you’ll find variable are renamed, parameters converted to hex, and everything simply made to look alien. This will break source-maps in development, and it can make debugging worthless as well, so make sure it is production-only.
The only data that is retained are the hard-coded strings. If you use constants for filter-names with redux, all of these constants will be at the top of the bundle. To avoid this, rely on the constant name, and change the constant values to hashes. Then it still makes sense in development, but the hoisted values are arbitrary.
TODO_ACTION_CREATE = '0x0001'
TODO_ACTION_EDIT   = '0x0002'
TODO_ACTION_DELETE = '0x0003'
Handling Local Storage
Local storage is the way to go when you want to retain the state of your application. Since this is just basic site storage, the data you save will go right into the user’s local storage in plain text. When your application saves sensitive data, you will want to encrypt it with something like Crypto-js before saving it to local storage.
Since string data is preserved in obfuscation, as mentioned in Code Obfuscation, there is a concern that our encryption cipher will be exposed in the bundle. Break up the cipher key into multiple constants, and then assemble them before the encryption/decryption process.
import 'Crypto' from 'crypto-js'

const secret = 'private'
const secret2 = 'cipher'

// secret and secret2 make up the full private key
export default class Crypt {
  static encrypt = data => {
    return Crypto.AES.encrypt(data, secret + secret2).toString()
  }

  static decrypt = data => {
    return data == undefined ? '' : Crypto.AES.decrypt(data.toString(), secret + secret2).toString(Crypto.enc.Utf8)
  }
}
With hundreds of thousands of variables in your bundle, and assuming anyone knows the cipher is there, extracting and re-assembling the cipher would be near-impossible.
The Cipher Tinfoil Hat
To take this to a super-paranoid level, you can split the cipher into even more parts. Taking advantage of the ES6’s Temporal Dead Zone, assign the values with a let statement, or const statement. This will cause the values to remain uninitialized until accessed in runtime, which avoids hoisting. Add these let/const values within closures, and they will dive even deeper into the bundle.
Working with Local Storage
A downfall to working with local storage, is that the storage is used across all environments, which causes development state to show in production. You can avoid this by setting the middleware to save environment specific state:
const Environment = process.env.NODE_ENV === 'production' ? 'production' : 'development'

export const loadState = () => {
  let config = JSON.parse(localStorage.getItem(`${Environment}-config`))
  let status = JSON.parse(localStorage.getItem(`${Environment}-status`))

  let persistedState = {}

  config !== null ? persistedState['config'] = config : null
  status !== null ? persistedState['status'] = status : null

  return persistedState
}

export const saveConfig = state => {
  const configState = JSON.stringify(state)
  localStorage.setItem(`${Environment}-config`, configState)
}
Adding Storage Middleware
To avoid issues with state between refreshes (i.e. middle of an API call), only save states after actions are triggered. This is a great way to keep request-reliant actions from getting stuck, persisting state around API calls:
export const saveState = (state, section) => {
  const savedState = JSON.stringify(state)
  localStorage.setItem(`${Environment}-${section}`, savedState)
}

const middleware = () => store => next => action => {
  next(action)
  let currentState = store.getState()

  // always save this state
  saveStatus(currentState.status, 'status')

  switch(action.type) {
    case 'SAVE_CONFIG_SUCCESS':
      // only save config when saved, or it could
      //   persist even when the user clears it
      saveConfig(currentState.config, 'config')
      break
      ...
Building with Electron Builder
When building Electron applications, Electron Builder is the preferred build suite. With a feature-rich configuration, it’s perfect for any project. It also offers features like auto-update handling, notarization, and the ability to configure based on platform.
Example Build Settings in package.json
  ...
  "scripts": {
    ...
    "dist": "electron-builder",
    "pub": "electron-builder --p always",
    "build-icons": "electron-icon-maker -i ~/icon_location/icon.png -o assets/app-icon/",
    "postinstall": "electron-builder install-app-deps"
  },
  "dependencies": {
  ...
  },
  "build": {
    "appId": "com.electron.appName",
    "productName": "appName",
    "afterSign": "./scripts/notarize.js",  // used for OSX notary
    "afterPack": "./scripts/afterPack.js",
    "publish": [
      {
        "provider": "github",
        "repo": "some-repo",
        "owner": "GHuser",
        "private": true,
        "releaseType": "release",
        "publishAutoUpdate": true
      }
    ],
    "copyright": "Copyright Author",
    "files": [
      "build/**/*"
    ],
    "directories": {
      "buildResources": "assets/app-icon"
    },
    "extraResources": [
      "assets/",
      "images/",
      "appName.VisualElementsManifest.xml"
    ],
    "mac": {
      "category": "public.app-category",
      "darkModeSupport": true,
      "entitlements": "build/entitlements.mac.plist",
      "gatekeeperAssess": false,
      "hardenedRuntime": true,
      "target": "dmg"
    },
    "dmg": {
      "artifactName": "${productName}-${version}_OSX.${ext}",
      "contents": [
        {
          "x": 110,
          "y": 220
        },
        {
          "x": 420,
          "y": 220,
          "type": "link",
          "path": "/Applications"
        }
      ],
      "sign": true
    },
    "linux": {
      "category": "menu-category",
      "target": [
        "AppImage"
      ],
      "artifactName": "${productName}-${version}_Linux.${ext}",
      "desktop": {
        "Name": "appName",
        "Terminal": false
      }
    },
    "win": {
      "icon": "assets/app-icon/win/icon.ico",
      "target": [
        {
          "target": "nsis",
          "arch": [
            "x64",
            "ia32"
          ]
        },
        {
          "target": "portable",
          "arch": [
            "x64",
            "ia32"
          ]
        }
      ]
    },
    "nsis": {
      "artifactName": "${productName}-${version}_Win-Setup.${ext}"
    },
    "portable": {
      "artifactName": "${productName}-${version}_Win-Portable.${ext}"
    },
    "buildDependenciesFromSource": true
}
The above shows a great amount of the functionality available through Electron Builder. Here are a few options we set:
- configuration for OSX, Windows, and Linux
- build files for the asar
- external resource files
- native dependencies
- independent naming based on build
- add script hooks to run processes around the build process
Just seeing what’s here will give you an idea of its ability. You can find all of the options in Electron Builder’s Configuration Docs. The most important being the options to include files. If you want to include any external files with your application, extraResources is where to get it done. The other file options are specifically for the build itself, which you can see from the file and buildFile settings.
Using the Tray with Caution
You may jump on the opportunity to add a TrayMenu, but with it comes a common issue. When this is enabled, your app will not close normally in certain platforms. Users will need to shut the client down from the TrayMenu, and users will not catch on quickly. When the client hasn’t been stopped, and the app is started again, another instance will be started. If you use local storage, you will find the second instance will fail to load that data.
This issue stems from the way the app is closed. We can instead listen for the close event, and then destroy the window when this event is triggered, causing the app to always close.
main.js (Electron)
  const windowList = []

  let win = BrowserWindow(windowOptions)

  ...

  win.on('close', e => {
    windowList.splice(windowList.indexOf(win), 1)

    e.preventDefault()
    win.destroy()
    app.quit()
  })
Code-Signing
Anyone who has used OSX has seen that error when opening a new app, that it hasn’t been verified or scanned for malware. You can keep these errors from existing when you sign and notarize your app, which is straight-forward when using Electron Builder.
With OSX builds, you will need an Apple Developer Account. Since it costs $99/year, it may not be easy to justify until you have more apps. You also need an account to handle notarization, which removes the Malware errors in Catalina and Big Sur.
Portable Builds
Portable builds are great when you don’t want to require installation, and the ability to run anywhere on the system. Linux and OSX builds are inherently portable, but Windows needs to be specifically built as portable. Example Portable builds targets in Electron Builder:
- OSX – DMG
- Linux – AppImage
- Windows – portable
Verify that your users can use the app anywhere on a given system. If your app accesses files not included within the build, you will need to workaround that. The system cannot always determine the local user or the user’s storage in OSX and Linux. Using public system resources like the temp directory for your file stores will allow you to get around this.
Electron Chrome Extensions
When you need Chrome extensions like the React or Redux DevTools, you have to import it in the main process from your local Chrome installation. In your main.js file, add a version-detecting import for the Chome extension. With this you never have to update the import when the extension is updated. After that, we enable Devtron:
const path = require('path')
const fs = require('fs')
const os = require('os')
...
if(process.env.NODE_ENV && process.env.NODE_ENV === 'development') {
let devtoolsExt
win.openDevTools()
let extensionHash = 'fmkadmapgofadopljbjfkapdkoienihi/'
switch(process.platform) {
case 'darwin':
devtoolsExt = path.join(os.homedir(), 'Library', 'Application Support', 'Google', 'Chrome', 'Default', 'Extensions', extensionHash)
break
case 'win32':
devtoolsExt = path.join(os.homedir(), 'AppData', 'Local', 'Google', 'Chrome', 'User Data', 'Default', 'Extensions', extensionHash)
break
case 'linux':
devtoolsExt = path.join(os.homedir(), '.config', 'google-chrome', 'default', 'extensions', extensionHash)
break
}
require('devtron').install()
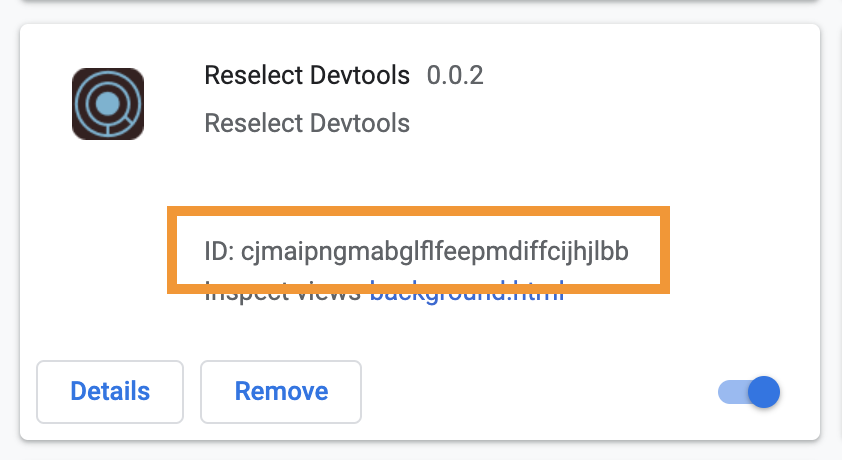
}The extension id shown is for the React DevTools. To find the extension ID, go to Manage Extensions in Chrome, and look at the ID shown with the Extension.
If you are using redux, be sure to use the Redux DevTools extension. If you don’t, and use the develoment tools within the renderer window, you may experience slowdowns. To keep state from causing this issue set a maximum total actions:
configureStore.dev.js
const store = createStore(
    rootReducer,
    {...initialState, ...persistedState},
    compose(applyMiddleware(...develMiddleware),
    DevTools.instrument({ maxAge: 60 }))
  );
Debugging with Devtron
The devtron extension, is a must-have that offers your Electron specific debug functionality. You can see your event listeners, and observe all IPC calls, while giving you direct event handlers for crashes, hangs, and exceptions. You also get a require graph for your windows, but webpack-bundle-analyzer does a better job of that.
Automated Testing
The majority of the code within the Electron script comes from Electron, which is rarely touched once it’s written. It’s when you add functionality with no direct relation to Electron, that you want to write tests around it. Even then, you can use a unit-test or two to test such functionality.
Handling tests around the biggest part of the application is most important, and that’s often the app in the renderer process(es). We can test these like we would any JS application. As mentioned before, there is an issue with testing using NodeJS integration. The problem arises when we decide to test our components, and that component has a NodeJS module in it. Electron is it’s own entity in this regard, so if you want to run end-to-end tests (a.k.a. e2e, integration) on that component, you will find it will fail when trying to include the NodeJS module.
For e2e tests you can use Spectron, a chrome-driver/web-driver testing platform for Electron. Lots of e2e tests can take a lot of time, so it’s isn’t feasible for running all of your tests. Let’s discuss another way to test our app.
Selective Automation
The biggest issue with testing with Electron, has always been to work around the NodeJS modules. We can take a more strategic and structurally sound route to avoid this. We need to be more explicit about where our NodeJS modules are imported and reside. The biggest problem is breaking the restrictions that comes with the NodeJS/Electron modules. Restricting NodeJS module imports to the lowest level components which only deal with logic, can help. Once it comes to testing those components, mock the modules, so tests can avoid them completely, and the errors that entail. With the visual components that need a NodeJS module, pass closures via props from the root component. This allows the visual component access, but keeping the module from being directly associated with it.
While there are other ways to go about it, using the root not only allows you to run unit-tests on the visual components, but keep them free to run e2e tests with whatever test runner you prefer. UI component libraries like Storybook, or StyleGuidist, will also be free of the module errors in this regard as well. The point being, module placement is critical for any library reusing these components.
Testing Electron with Cypress
The Cypress team has been working on an Electron-based implementation of Cypress for some time. This would certainly bring a more comfortable and quick environment to Electron e2e testing, giving a speedy test runner to the Electron environment. One big selling point is the ability to use it for one long e2e spec to test the entire app all at once, and quickly! If you are also interested in this project, check out the following post on their blog, and show your support on the following GitHub issue on the Cypress Electron branch.
Making the Most of Your Apps in Electron
Updating Electron
Allowing your app to offer automatic updates is a feature that offers great convenience to your users, but requires careful attention. Using the publish option from Electron Builder is what you need to start. The rest is setting up the Electron Builder Auto-Update events. Once added, it is important to note that you will need to test updates with a production build. While you can test the events to an extent in development, it requires the auto update xml files in the app build itself, something you cannot achieve outside of a production build.
Performance Handling
When it comes to handling resource intensive processes, you may find yourself instinctively placing your resource heavy scripts within the Renderer process. Doing this will quickly prove to be a taxing move on the performance. Similar to performance for a web-app in a browser, the renderer process is really only there to display, and has a limited amount of resources. Watching the performance monitor, if you see a function that’s too heavy, it may be time to move it somewhere else.
By default, larger scripts that demand large amount of the CPU and memory are better run within the main process. As long as the script is non-blocking, Electron will keep the script from interfering with performance by running in the background. The major downside comes with the need for the Inter-Process Communication, passing the data to and from the main process and back to the renderer. If you are passing a lot of data back and forth, this could become extremely inconvenient.
If placing your script in the main process isn’t feasible, you also have the option of placing that particular script within a Web Worker. These will place your script into its own NodeJS process, separate from Electron, with a lack of access to the Electron API. This will make your app a multi-threaded application, allowing memory corruption, and race conditions, but can be avoided with Thread Safety concerns.
Multi Window Applications
It is certainly easy to create a multi-window application app in Electron, but what if you want to communicate between these windows? Here is where we run into some short-comings with the V8 Engine. First off, there is no way to directly communicate between one window and another. Instead, we have to communicate through the main process, and have the main process contact the other window, all while keeping track of the ID of the calling window, so we know where to return the response.
Talking between windows requires our own message passing system, which I discuss in detail in my Window to Window Communication in Electron.
Native Modules
One of the most intimidating features is building native modules, but is actually an easier concept than it’s initially perceived. It’s important to keep in mind that native modules are incredibly rewarding additions. They bring great power to your applications, and why you can also find existing JS modules including native modules.
The need for native modules isn’t common, except when you plan to write your own C++ modules. Unless you are familiar with building C++ modules in general, I wouldn’t recommend digging too deep into this process. Regardless, we can take a look at some common requirements.
While it sometimes works out of the box, a lot of failures are due to dependency changes getting in the way. To avoid this, add a postinstall script to sync application dependencies any time a dependency changes.
"scripts": {
  ...
  "postinstall": "electron-builder install-app-deps"
Building Native Modules
When it comes to module building, there are several solutions to choose from. For this it’s suggested to read the Electron doc on Using Native Modules. The idea is that we are building platform-specific modules for each given platform, so we can offer these additional features across multiple platforms. Another common problem is building on a version of NodeJS that is incompatible, usually because it’s too new. If you can stay away from bleeding-edge versions of NodeJS, you can usually keep common build errors at bay.
The most obvious option is to build modules manually using node-gyp, and requires node-gyp to build.
$ yarn global add node-gypWhen a native module doesn’t work in your application, your first step should always be to rebuild electron, making sure it’s not a mixup of version dependencies. So install that locally for future use:
$ yarn add electron-rebuild -DIf your plan is to only grab and build pre-made native modules, the easiest option for accomplishing this is to use the node-pre-gyp package, which will help you install prebuilt native binaries, but has a limited selection of modules.
Introducing WASM
While native modules are great, there is another venue for introducing native modules, and that is through the use of WASM (WebAssembly). WebAssembly, allows for CPU/GPU heavy applications to be run within the browser. If you are familiar with the Unity game engine, you may be familiar with the ability to build games using WebGL in Unity 2018.1 and beyond. The engine uses WASM to allow graphic-intensive games to be played from the browser. Check out the Unity’s Angry Bots demo.
Note: Electron also offers WebGL support, it’s just a matter of flipping the switch in the BrowserWindow options.
Aside from the ability to access the system on a lower-level, the performance boost is also a great benefit of using WASM for parts of your application. When using WASM, it completely bypasses the JavaScript interpretor, in turn creating less of an overhead when being run. You don’t need to move all your code over to WASM, instead you can import your WASM modules using them like any other JavaScript class object.
Now for the more intimidating portion, the development process. When it comes to development in the Rust language, it is surprisingly pleasant for a static language. Not only is it a lot more forgiving when it comes to building native modules, it is outstanding about giving legible errors:
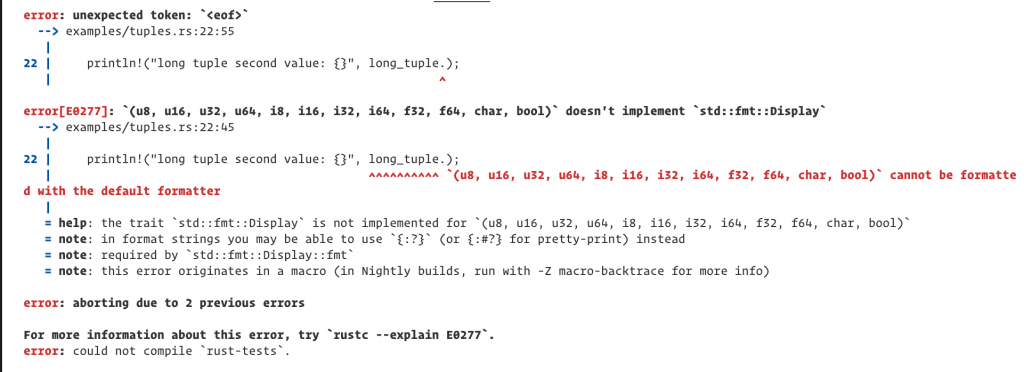
To try it out, the following tutorial will guide you through the process of creating a WASM app in Rust, as well as including it into a web-application. If you want to incorporate that application into an Electron app, take a look at this Electron-WASM example project. Really, the process is a lot easier that one would think, and a whole lot easier than building node native modules.
Summary
I know there is a lot to take in here, but Electron is more involved than one would originally imagine. For now, these are the most common use-cases to be aware of when working with Electron.
No Comments