Webhook Deployments with GitHub
Having your own automatic setup for webhook deployments can be incredibly useful, but getting it setup can sometimes be a bit of an issue. To avoid this issue, we will look at ways to setup and use Go’s webhook server to setup your own automatic webhook deployment with GitHub.
About Webhook Deployments
If you have any apps hosted on remote platforms like Heroku, AWS, & Azure, you may already be familiar with automatic webhook deployments. For those who are not, webhook deployments are handled through your version control system (e.g. GitHub, GitLab, etc). When the code in our repository is updated, depending on the conditions set, the remote host will grab the latest version of the app and then automatically update it on the remote host. This is great, but if you need to host the app on a custom server, you need to provide a webhook deployment method yourself. We will create our own custom system using a webhook listener and sending updates with GitHub.
For this article we will be using a Linux system, but you can use the setup as a template for other OS’es.
Our Planned Setup
- Setup Our GitHub Repository for Webhook Deployments
- Install Webhook Listener
- Create a Key Pair for SSL
- Setup Automatic Webhook Deployments
- Setup Firewall Rules
- Testing our Webhook Deployments
- GitHub Setup for Webhook Deployments
- Add Configuration for Pull Requests
- Adding Another Repository
- Failure Mitigation with Supervisor
Setup Our GitHub Repository for Webhook Deployments
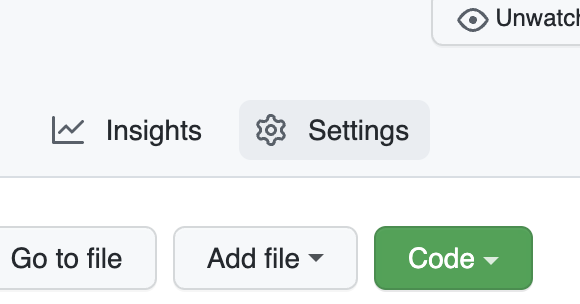
We need to start by creating our webhook setup on GitHub. To get to the Webhook settings, we navigate to the repository we want to monitor, and click the Settings button.
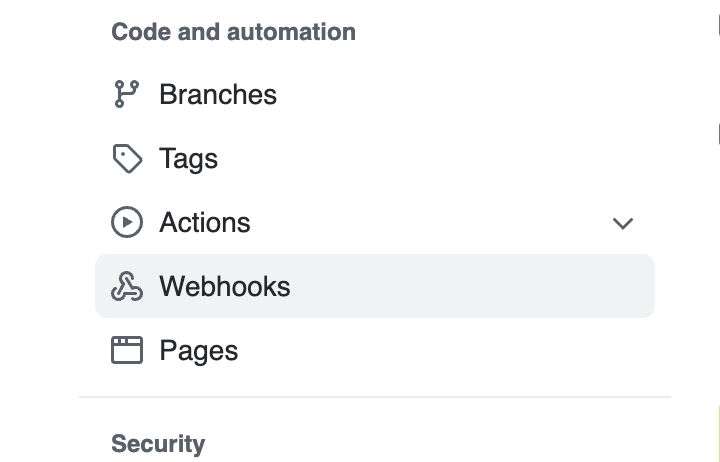
On the page that opens up, select Webhooks from the menu on the left-hand side:
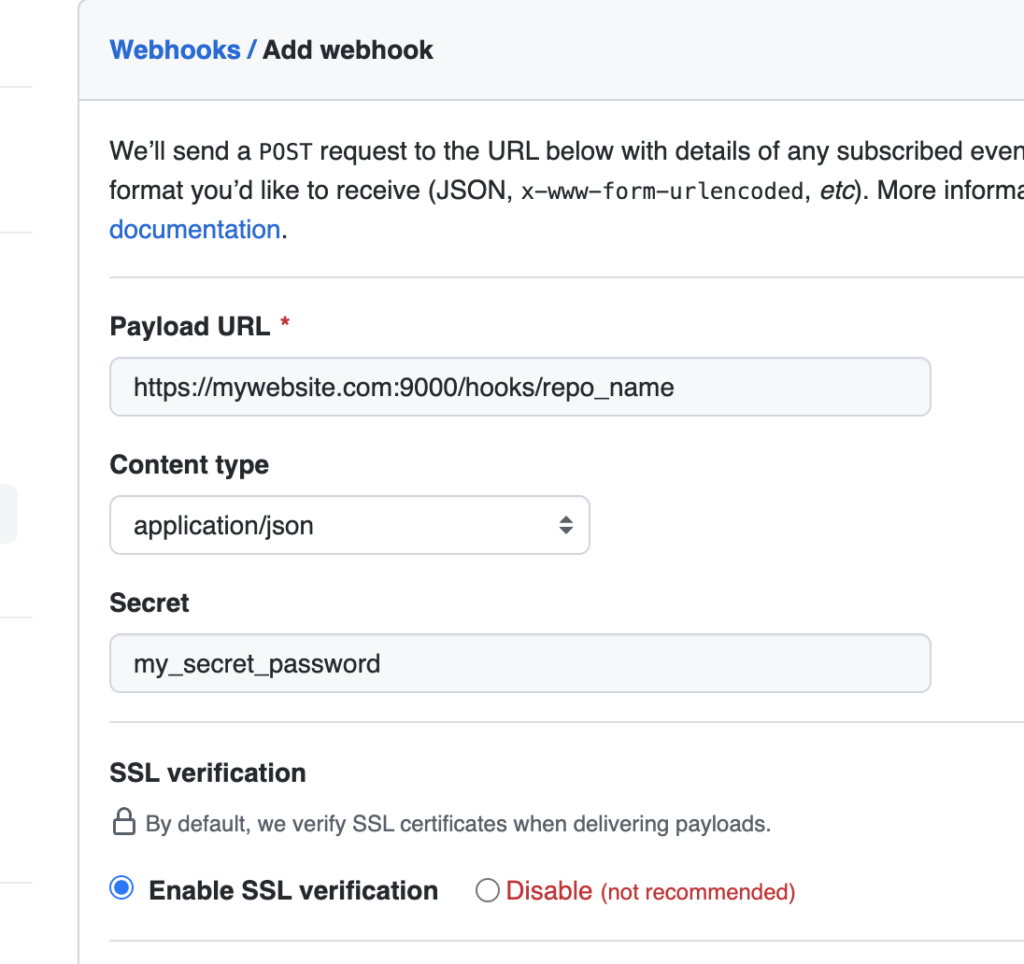
Once the Webhook settings page is open, click the button to Add Webhook. On webhook settings form, we need to add the address of the server which will be hosting our app. Our listener will be listening on port 9000 by default, and it will be listening on the path /hooks/repo_name . An example address might be:
https://mywebsite.com:9000/hooks/repo_nameOnce the address is added, change the response to JSON, and set a password for the webhook.
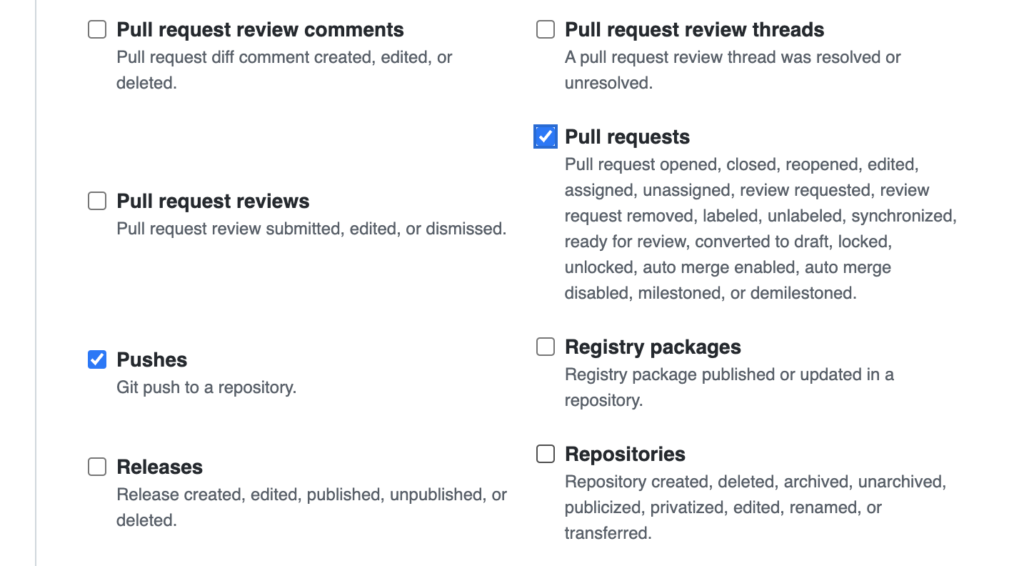
Last on the list is to set the webhook events to enable for the webhook. By default push events will be enabled, and we’ll leave that enabled in order to test our listener. As we move forward, we’ll want to enable Pull Requests, which you can enable now, or later when we get to that point. Either way, its good to know where this setting is when we need it (you can access these settings again when editing the webhook).
Once the settings are complete, create your new webhook. Once the hook is created, we’ll see our new webhook in the webhook settings page. If we click on Recent Deliveries, we’ll also see that a response has already been sent to the address. When the time comes to test the listener, we can click the Redeliver button to send the same payload to our listener. Until then, let’s setup our listener.
Install The Webhook Listener
Installation of the listener is really simple. First, install Go on the system which will be hosting the application. Most, if not all Linux distributions offer a Go Language package which you can install via the package manager.
Debian/Ubuntu:
# apt install golangFedora/RedHat:
# dnf install goOnce Go is install, we want to install the webhook listener:
# go build github.com/adnanh/webhookCreate a Key Pair for SSL
Before we start the listener, let’s create some SSL keys so we can utilize SSL. If you still need OpenSSL, be sure to install it first:
Debian/Ubuntu:
# apt install opensslFedora/RedHat:
# dnf install opensslNow we create the SSL keys needed for our connection into the /root folder:
# openssl req -newkey rsa:4096 -x509 -sha256 -days 3650 \
-nodes -out /root/webhook_ssl.crt -keyout /root/webhook_ssl.key
You will be prompted to add the Country, State, Organization, and Common Name. This is for your own use, so you can really add whatever you want. Once you’re done, you’ll have two files, a crt file and key file. We’ll need to reference both of these later.
Setup Automatic Webhook Deployments
With the listener installed, we can now create a configuration to listen for requests. First let’s great our directory structure for our listener. We will run the listener as root, so be sure to log into your terminal with root access. First navigate to the root directory:
# cd /rootOnce in the root directory, we create a new webhooks directory and change to that directory:
/root # mkdir webhooks; cd -Now we want to create two new files, hooks.json and deploy.sh, then add execution permissions to the deploy.sh file:
/root/webhooks # touch hooks.json deploy.sh
/root/webhooks # chmod 744 deploy.sh
Next use your preferred text editor to edit the hooks.json file, and add the following:
[
  {
    "id": "my_repo",
    "execute-command": "/root/webhooks/deploy.sh",
    "command-working-directory": "/root/webhooks"
  },
  "trigger-rule":
  {
    "and":
    [
      {
        "match":
        {
          "type": "payload-hmac-sha1",
          "secret": "my_secret_password",
          "parameter":
          {
            "source": "header",
            "name": "X-Hub-Signature"
          }
        }
      }
    ]
  }
]
Our hooks.json file works as follows:
The id matches the webhooks path we set in GitHub. Matching the GitHub settings example, our path was set to my_repo, so we set the id to match this name. Also in the match section, we set the password which was set in our webhook settings. This will guarantee that GitHub is the only one able to send requests.
Now we can run our listener using the following command:
/root/webhooks # /root/go/bin/webhook -hooks /root/webhooks/hooks.json -ip "0.0.0.0" -secure -cert /root/webhook_ssl.crt -key /root/webhook_ssl.key -verbose &Setup Firewall Rules
Before we test our listener, we want to make sure the firewall is able to allow incoming connections.
iptables:
# iptables -A INPUT -p tcp -m tcp --dport 9000 -j ACCEPTnftables:
# nft add rule ip filter INPUT tcp dport 9000 acceptTesting our Webhook Deployments
Now that everything is setup, we should be ready to test our webhook. Since we’re listening for any request, we simply need to return to our Webhook Settings, then Recent Deliveries. Once there, we want to redeliver the request that was sent when creating the webhook. When we redeliver, we should see a response from our listener, and the webhook manager should show a green checkmark next to the webhook address in GitHub. If it failed, be sure to retrace your steps, and make sure everything is correct.
Troubleshooting Steps
- No response
- check the webhook address, and make sure the domain, port and path are correct.
- make sure the firewall is accepting connections for port 9000
- Error From Listener
- If missing hook error, make sure the id and path match
- If TLS error, make sure the SSL key settings are correct
If everything is working, you are setup to deploy with each push to the repository. Now we can setup our repository and deploy script.
GitHub Setup for Webhook Deployments
Now that our listener is working, we need to give it something to do. First we need to make sure our GitHub repository is accessible. Clone your repository to whatever directory you want. For this example, we’ll use a directory accessible to the www-data user.
# cd /var/www
# git clone https://github.com/your_account/my_repo.git
Now we edit our deploy.sh script back in the webhooks directory. Keep in mind this will be executed from the current directory of the listener, unless you configure the hooks.json file to use a different directory:
#!/bin/bash

cd /var/www/my_repo
git fetch
git pull

# run other steps needed to update your app.
# Here is an example for a Node.JS app managed by supervisor
supervisorctl my_app stop
yarn install
yarn build
supervisorctl my_app start
Since the listener is already using the deploy.sh script on updates, this script will be automatically executed with each commit pushed to our repo.
Add Configuration for Pull Requests
Having the app update with each push isn’t always the best idea, so let’s look at how to only update with a merged pull request. If you haven’t enabled Pull Request events for the webhook, be sure to look back at the first step, and enable this event.
To understand the data we will be match, be sure to refer to the response object for pull requests.
To handle PR’s we want to add 3 more rules to the config. First, we want to make sure it’s a Pull Request, which we do by matching the pull_request object (payload.pull_request), which we’ll do with our additional rules.
The first is to match the branch being merged to. In this example that branch is master . Change the branch to whatever branch you expect to merge PRs into. The next rule will check to make sure the PR is set to a status of closed . This will make sure that only closed PRs can trigger this rule. Lastly, we want to make sure the branch has been merged with master. With these three rules, we only allow merged PRs to trigger the deploy script.
[{
    "id": "my_repo",
    "execute-command": "/root/webhooks/deploy.sh",
    "command-working-directory": "/root/webhooks/",
    "response-message": "Executing deploy script...",
    "parse-parameters-as-json": [
	{
   	    "source": "payload",
	    "name": "payload"
	}
    ],
    "trigger-rule": {
	"and": [
	    {
	        "match": {
	            "type": "payload-hmac-sha1",
	            "secret": "my_secret_password",
	            "parameter": {
	       	        "source": "header",
		        "name": "X-Hub-Signature"
	            }
	        }
	    },
	    {
		"match": {
		    "type": "value",
		    "value": "master",
		    "parameter": {
			"source": "payload",
			"name": "payload.pull_request.base.ref"
		    }
		}
	    },
	    {
		"match": {
		    "type": "value",
		    "value": "closed",
		    "parameter": {
			"source": "payload",
			"name": "payload.pull_request.state"
		    }
		}
	    },
	    {
		"match": {
		    "type": "value",
		    "value": "true",
		    "parameter": {
			"source": "payload",
			"name": "payload.pull_request.merged"
		    }
		}
	    }
	]
    }
}]
Adding Another Repository
When using the webhook listener, you can handle multiple repositories if you want. You may have noticed that the configuration in the hooks.json file is actually in an array. To add another config, we simply add another configuration object to our array within the hooks.json file.
[
  {
    "id": "my_repo",
    "execute-command": "/root/webhooks/deploy.sh",
    "command-working-directory": "/root/webhooks"
  },
  "trigger-rule":
  {
    "and":
    [
      {
        "match":
        {
          "type": "payload-hmac-sha1",
          "secret": "my_secret_password",
          "parameter":
          {
            "source": "header",
            "name": "X-Hub-Signature"
          }
        }
      }
    ]
  },
  {
    "id": "my_2nd_repo",
    "execute-command": "/root/webhooks/deploy2.sh",
    "command-working-directory": "/root/webhooks"
  },
  "trigger-rule":
  {
    "and":
    [
      {
        "match":
        {
          "type": "payload-hmac-sha1",
          "secret": "my_secret_password",
          "parameter":
          {
            "source": "header",
            "name": "X-Hub-Signature"
          }
        }
      }
    ]
  },
]
Failure Mitigation with Supervisor
You may have noticed we’re starting our script manually. We could create a bash script to run our listener, but if anything ever happens, or need to restart the server, we’ll need to start the listener again. We can avoid all of this by using supervisord. I won’t go into detail into how to install supervisor, but here’s a quick configuration to get you setup:
[supervisord]
logfile=/var/log/supervisord
logfile_maxbytes=0
loglevel=info
childlogdir=/var/log/supervisor
pidfile=/tmp/supervisord.pid
nodaemon=true
user=root

[supervisorctl]
serverurl=unix:///tmp/supervisor.sock

[rpcinterface:supervisor]
supervisor.rpcinterface_factory = supervisor.rpcinterface:make_main_rpcinterface

[unix_http_server]
file=/tmp/supervisor.sock

[program:git_webhook]
command=/root/go/bin/webhook -hooks /root/webhooks/hooks.json -ip "0.0.0.0" -verbose
stdout_logfile=/var/log/git_webhooks/access.log
stderr_logfile=/var/log/git_webhooks/error.log
Supervisor is a great tool for keeping services alive, and a great way to handle the restarting of your services when using your deploy script.
No Comments