The Redux App – Getting Started with Redux: Part 2
Now that we have an understanding of what benefits we get from redux, we want to see how Redux works. So we are going to go ahead and make a redux app. We will also look at each object’s role, and how they work in redux. In the process we also look at the different methods of using Redux in our applications. Lastly, we’ll look at debugging our redux app using Redux DevTools. Let’s build our redux project!
If you haven’t already, be sure to check out Part 1: Beginner’s Guide to Redux – About Redux
The Plan for our Redux App
What you can expect from here is turning a simple React boilerplate application into a fully functional React-Redux app. Like in Part 1, the application uses a standard Redux scaffolding to help explain the system and its roles.
Let’s start by cloning the following repository:
Pre-Redux React App and Boilerplate
Before we start, let us discuss a few concepts we need to keep in mind when using Redux. First, since our state is immutable, and we find ourselves changing state manually, there is often a better way to accomplish that task. Our react components should also follow the declarative convention of Smart, and Dumb Components. This leaves the job of handling state to our Smart Components. and presentation to Dumb Components. You can read up on this practice in Dan Abramov’s article on components.
Redux App Actions
branch: 01-actions
For those following along, go ahead and switch to the branch listed under the section name in the git repository.
The first part we want to abstract out, are the actions we use within the app. When we add them to the components themselves, we end up with extremely long components with lots of methods. Moving to Redux these actions will instead reside in the Actions folder, and within its own namespace.
We don’t want our actions in a single file, since it only moves the problem to a different folder. Instead we classify our actions based on what the these actions actually control. Right now we will only focus on the Counter actions so we will actually make the namespace Counter. To give a home to these actions we create a new file in the Actions folder named CounterActions.js, and put the actions in exported functions:
import * as types from './ActionTypes'

export function counterUp() {
  return {type: types.COUNTER_UP}
}

export function counterDown() {
  return {type: types.COUNTER_DOWN}
}
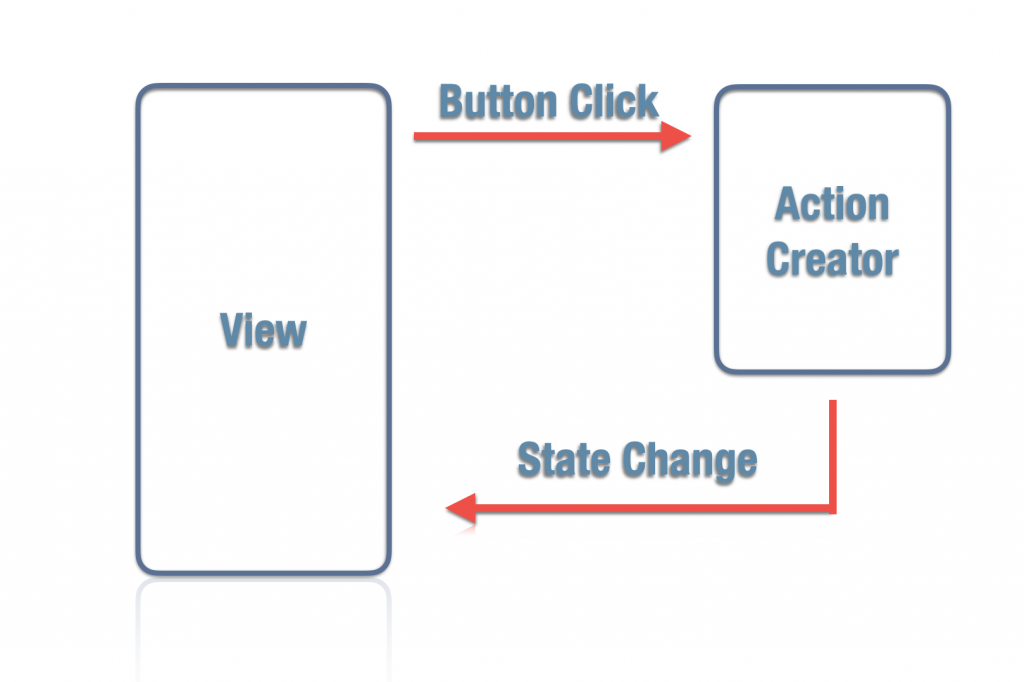
Our actions are a bit different. We call these “Action Creators”, but accomplish the same task. Instead of our actions directly changing the state, it returns an object with the action. This is the common pattern for Synchronous actions within Redux. We use these since we do not need to wait for a response, and all props are in the payload.
Next we need to address our imported action types. This import is nothing more than a list of our action filters for our Redux app. So we create another file in the Actions folder called ActionTypes.js with the following code:
// counter
export const COUNTER_UP = 'COUNTER_UP';
export const COUNTER_DOWN = 'COUNTER_DOWN';
We could pass a string directly, but this method makes for a great way to keep track of your actions*.
*It is also a good way to obfuscate your actions for bundling, since the strings our hoisted. I show an example of this practice in the Obfuscation section of Writing Complete Apps in Electron.
Calling Actions
With our actions ready to use, it is now time to plug these actions into our application. Back in our App.js file, let’s start removing the old methods. First we need to add the necessary modules below the React import:
import React, { Component } from 'react'
import { connect } from 'react-redux'
import { bindActionCreators } from 'redux'
...
We can use the dispatch action to call our actions. When we can call our action creators with the dispatch action, we use the following composition:
store.dispatch(actions.actionName(data))
Using dispatch direction can get very repetitive. Luckily there is a much better way to go about it. Instead we can use React Redux to attach our actions to the component props directly. We’ll first give our App file access to our actions by importing all of them:
import * as CounterActions from '../actions/CounterActions'Now it is time to attach our actions to props and adding the following after the App class:
class App extends Component {
...
}

function mapDispatchToProps(dispatch) {
  return {
    actions: bindActionCreators(CounterActions, dispatch)
  }
}

export default connect(mapDispatchToProps)(App);
We remove the export from the class and move it to the new connect default export. With our actions now attached to props, we can access any of our Counter Actions with this.props.actions.actionName.
Now we need to actually hook these up so they actually do something.
Redux Reducers (Where the Actions Happen)
branch: 02-reducers
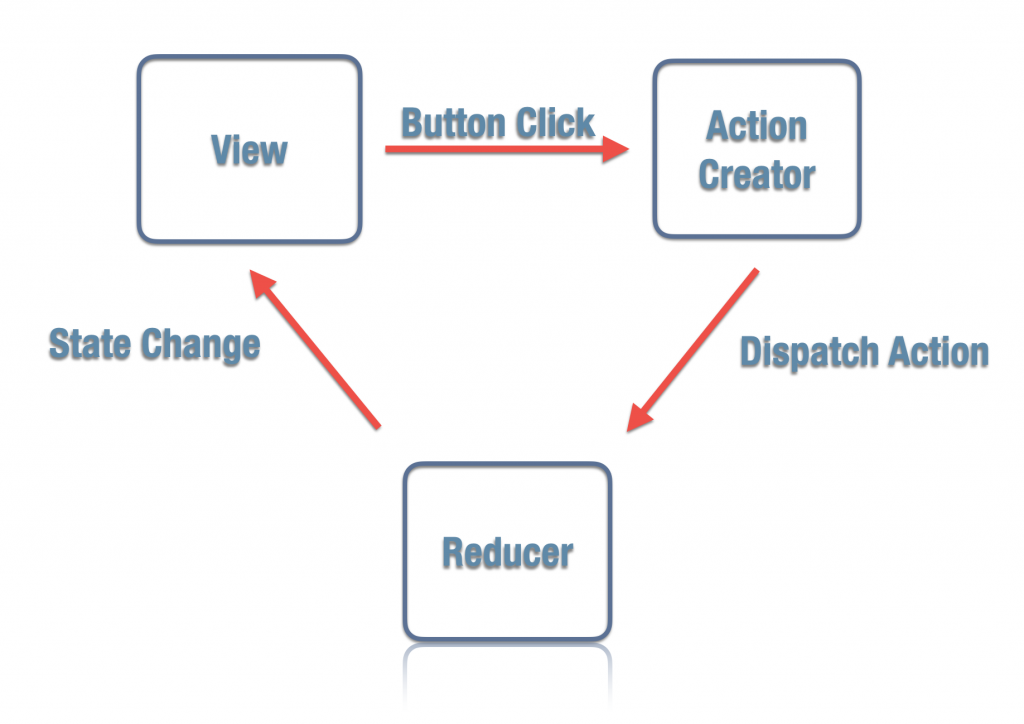
Now that the actions are out of the way, we need something for our actions to actually interact with. We call this component the Reducer. The reducer handles our state, as well as acts as a listener for all of the actions called to change state. So now it is time to start adding some listeners so our actions’ commands can stop going unheard.
Starting off, all of our reducer logic will live within our Reducers folder, and to get us started we will create a new file called rootReducer.js:
import { combineReducers } from 'redux'
import CounterReducer from './CounterReducer'

const rootReducer = combineReducers({
  counter: CounterReducer
})

export default rootReducer
As you can see the root is pretty boring, and for good reason. The idea here is to have a single file that handles all of our other reducers. As you can see we already included our non-existent CounterReducer. Since we do not directly interact with this file, I like to make the first letter in the file lower-case. Our root reducer takes all reducers, then combines them together. Let’s go ahead and create our CounterReducer.js file:
import * as types from '../actions/ActionTypes'

let total = 0

export default function counterReducer(state = {total}, action) {
  switch(action.type) {
    case types.COUNTER_UP:
      return {
        total: state.total + 1
      }
    case types.COUNTER_DOWN:
      return {
        total: state.total - 1
      }
    default:
      return state;
  }
}
In the reducer we take in two parameters: the state, and the action. The switch statement is triggered by the action type, matching our action type constants. These are our action listeners.
Since these can be created without limitation, we can have dozens of reducers. As long as actions have unique types, they won’t have issues knowing what action to call. Reducers actions are not restricted by their reducers. To give you an example, if we send a CounterAction type, but the action resides in a completely different reducer.
Passing actions across reducers allows you to create generic action events, like error notifications. No matter where you call it, it will always act the same. When the app encounters an error it passes the error from any reducer to the frontend. Then it triggers the pop-up notification with the error. We will see an example of this later.
Besides receiving actions the reducers are also the gatekeepers to our state. You will notice that in each instance we are returning an object, and each object contains our new updated state. Of course you may wonder why are we breaking the immutable rule, aren’t we just changing the object? Yes, we are, and don’t worry we’ll get into that a little later.
Let’s keep all of that in mind, and move on to our new store.
03 The Lonely Redux Store
branch: 03-store
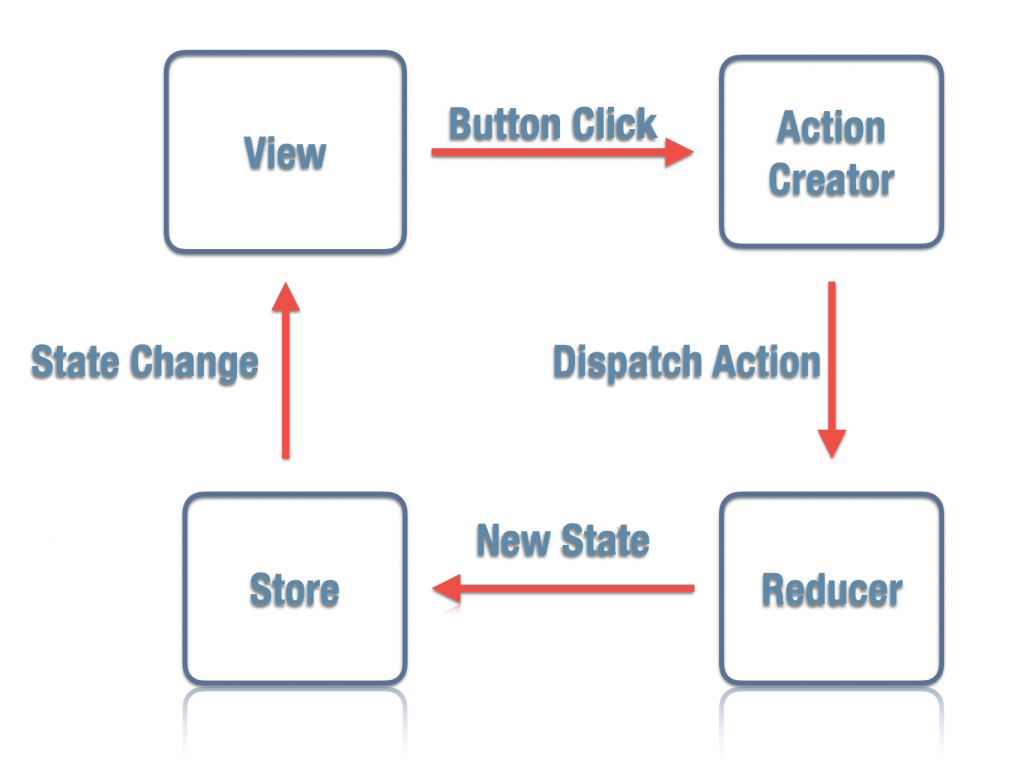
With the actions and reducer ready to handle actions, we still don’t have anything that actually holds state. The store keeps track of our state, and interacts with our reducers which requests state changes.
In more complex cases, you may will find yourself replacing the jobs of the reducer, and actions in the store. In the meantime, let’s create our store to at least see what it does.
 import { createStore } from 'redux'

import rootReducer from '../reducers/rootReducer'

const configureStore = () => {

  const store = createStore(
    rootReducer
  );

  return store
}

export default configureStore
With our configureStore file ready to go, our basic redux setup is pretty much complete. Even so, we still need to connect it to React. Let’s visit our index file, and connect the store to the rest of the app.
import style from './style/style.scss'
import React from 'react'
import { render } from 'react-dom'
import configureStore from './store/ConfigureStore'
import { Provider } from 'react-redux'
import App from './components/App'
import ErrorBoundary from './components/ErrorBoundary'

const store = configureStore()

render(
  <ErrorBoundary>
    <Provider store={store}>
      <App />
    </Provider>
  </ErrorBoundary>,
  document.getElementById('app')
);
We have wrapped our App with the Provider component giving our app access to the Redux store. While this may not seem like much, this is an extremely important component. To start planning our state structure, we create a new initialstate.js file in our reducers folder. This file will act as the default state values when the app opens.
 export default {
  total: 0,
  title: 'Our Redux App'
}
Now in the reducer we can use our initialstate object for the state provision:
import * as types from '../actions/ActionTypes'
import initialState from './initialState';

export default function counterReducer(state = initialState, action) {
  ...
We now need to connect our state to the component similarly to how we connected our actions. We can do this using mapStateToProps which is added next to our mapDispatchToProps in the App.js file:
 function mapStateToProps(state) {
  return {
    state: state
  }
}

function mapDispatchToProps(dispatch) {
  return {
    actions: bindActionCreators(CounterActions, dispatch)
  }
}

export default connect(mapStateToProps, mapDispatchToProps)(App);
Using Redux State in the App
With the state connected to the component, we can remove our component’s counter. Thanks to our mapStateToProps we can also access our state using this.props.state. So any call to this.state.total, or this.state.title can be switched to this.props.state.total, and this.props.state.title.
 render() {
    return (
      <div className="container">
        <div className="body">
          <h1>{this.props.state.title}</h1>
        </div>
        <div className="body counter">
          <div className="counter-number">
            <h1>{this.props.state.total}</h1>
          </div>
          <button
             className="button btn-light"
             onClick={() => this.props.actions.counterUp()}>
             +
          </button>
          <button
            className="button btn-light"
            onClick={() => this.props.actions.counterDown()}>
            -
         </button>
       </div>
...
Excellent! Now we can remove the old methods and state from App.js cleaning up our component. But first, let’s finally fire up the app and test this out. In the root of our project folder run the following command to start webpack:
$ yarn devOnce webpack has started, go to http://localhost:3000 to view the app. If you click the counter buttons, you may notice nothing is happening. What’s going on?
Everything is setup correctly, but I thought this would be a good opportunity to sneak a bug into the code. Let’s add Redux DevTools so we can debug our issue.
04 Adding Redux DevTools
branch: 04-middleware
When adding the Redux Devtools to the app, we do this through middleware. We discuss this in greater detail below, but keep in mind we have access to all of redux here.
Start by creating a DevTools Container Component. We’ll add this in a file named DevTools.js in the App/containers folder.
 import React from 'react'

import { createDevTools } from 'redux-devtools'
import { compose } from 'redux'

import LogMonitor from 'redux-devtools-log-monitor'
import DockMonitor from 'redux-devtools-dock-monitor'

export default createDevTools(
  <DockMonitor toggleVisibilityKey="h"
               changePositionKey="ctrl-q"
               changeMonitorKey="ctrl-m"
               defaultIsVisible={true}
               defaultPosition="right">
    <LogMonitor />
  </DockMonitor>
);
This component will be used to intercept data passing to and from our store. This allows us to debug our redux code from the frontend. There are a few different hotkeys defined in our component, and can be quite helpful in the future. For now, we’ll use their defaults. I would suggest reviewing the docs at some point to learn more about what is available.
Now let’s connect our new container component to the store in our index.js file:
import style from './style/style.scss'
import React from 'react'
import { render } from 'react-dom'
import configureStore from './store/ConfigureStore'
import { Provider } from 'react-redux'
import App from './components/App'
import ErrorBoundary from './components/ErrorBoundary'
import DevTools from './containers/DevTools'

const store = configureStore()

render(
  <Provider store={store}>
    <ErrorBoundary>
      <App />
      <DevTools />
    </ErrorBoundary>
    </Provider>,
  document.getElementById('app')
);
We also need to allow it to see our actions. We do this by connecting it in the configureStore where the component will act as middleware for the redux store.
import { createStore, <strong>compose</strong> } from 'redux'
import DevTools from '../containers/DevTools'

import rootReducer from '../reducers/rootReducer'

const configureStore = () => {

  const store = createStore(
    rootReducer,
    compose(
      DevTools.instrument()
    )
  );

  return store
}

export default configureStore
Now that we have DevTools setup we can find out why our counter isn’t working. So let’s start webpack again and go to http://localhost:3000:
$ yarn devThis time we should see our app with our Redux DevTools side-panel.
Redux DevTools Time Travel
“Time Traveling” is a feature you get with Redux, and it makes development a lot easier.
If we click on the COUNTER_UP and COUNTER_DOWN actions, Redux will restore the previous state. Next, clicking Reset will completely reset the state. If you click Commit, it will commit all of the current changes and set a new reset point. Clicking Revert will reset the state without resetting the Commit. Lastly the Sweep button will clean up and remove any actions in your current state which have been reversed.
Getting the Counter Working
If you haven’t already, install the React Developer Tools. By using React DevTools, we can target the Title’s H1 tag’s props. At this time we see it’s “none”, so our issue is with missing props. Let’s add PropTypes to check these during Runtime.
App.propTypes = {
  counter: PropTypes.shape({
    title: PropTypes.string.isRequired,
    total: PropTypes.number.isRequired
  })
}
In the devtools we will see that the state referenced is state => counter => title, and this is because the counter object we added in the initialstate. Instead of just accessing state in the component, we need to access the state.counter object. To fix this, we can just change our reference in our mapStateToProps within the App.js file:
 function mapStateToProps(state) {
  return {
    state: state.counter
  }
}
Now we should be able to see the state in the view, so let’s test the counter. Whoa, now when we press either counter button, we lose our title. Now what??
Altering our State
Looking at the devtools once again, we see something odd. When we call COUNTER_UP or COUNTER_DOWN, the title is removed from the state. Think about where our state is being altered, the reducer.
When changing Redux data there are two things we want to remember:
- we never want to mutate the state
- we always want to return a new state object for the reducer
In our reducer we are not accomplishing #2, because we are only returning the total. Since we don’t include the title in the new state object, we lose it in the process. So we want to make sure to return the rest of the state when returning our new object. Of course, we don’t need to do this explicitly for every property. Instead we can spread our state, and only alter what changes:
import * as types from '../actions/ActionTypes'
import initialState from './initialState';

export default function counterReducer(state = initialState, action) {
  switch(action.type) {
    case types.COUNTER_UP:
      return {
        ...state, total: state.total + 1
      }
    case types.COUNTER_DOWN:
      return {
        ...state, total: state.total - 1
      }
    default:
      return state;
  }
}
Our state spread presents all of the current properties into the new object. Then we can replace the state we want to change. With that changed, we can use our counter, and no longer lose our title in the process.
Middleware
We touched on it briefly, but Middleware is by far the most underrated feature in Redux.
Let the Redux DevTools, middleware is attached the central point of redux, the store. For this reason middleware can intercept and call actions, as well as change state based on what is being called. A common middleware added is persisted state, which intercepts actions saving the state after the action is run.
We discuss Asynchronous actions in Getting Started with Redux: Part 3 – Refactoring, but before that we need to add the thunk middleware to make that possible. We alter our configureStore by adding thunk to our store:
import { createStore, applyMiddleware, compose } from 'redux'
import DevTools from '../containers/DevTools'
import thunkMiddleware from 'redux-thunk'

import rootReducer from '../reducers/rootReducer'

const configureStore = () => {

  const store = createStore(
    rootReducer,
    compose(
      applyMiddleware(thunkMiddleware),
      DevTools.instrument()
    )
  );

  return store
}

export default configureStore
NOTE: To make sure our DevTools do not break, make sure it is the last entry in the compose.
This is not the only way to incorporate asynchronous actions. There are other libraries that add even more functionality, like Redux Sagas. You can also use Redux Observables with RxJS, as well as promises. So many choices!
We covered all of the redux basics, and how to use it in its simplest form. Now, it’s all about making the best use of redux, which we cover in the next part!


No Comments