Renaming React-Native Apps
Changing the name in a React-Native app, isn’t all that straight-forward. To be completely honest, renaming React-Native apps has been discouraged, so the common suggestion has been to simply make a new app with the correct name, then migrating your code. As someone who has never felt this was a true solution, I wanted to find exactly what it took to make this change, and it was a lot easier than I expected.
The process of changing the name of a React-Native app is fairly simple, but quite involved. The majority of it is simply renaming files, and making sure the references are updated to match the new name. Instead of doing a find and replace for everything, which is usually what causes problems with name changes, we’ll go through each part, so when you run into an error you’ll know exactly why. In this article, I will be loosely referencing the app’s name as “app_name” or “old_app”, and the replacement name as “newappname”, when applicable.
Prior Preparation
Before we start, make sure your app has no issues building before starting. Renaming is going to cause errors, so you don’t need more errors to cause confusion. We also need to do some cleanup or we could end up with some reference artifacts. If you haven’t already, install react-native-clean-project, and use it to remove all existing cache.
$ react-native clean-projectWe don’t want references to the old name interfering with our updates. For iOS, we also want to remove all of our Pods. From the project folder, run the following command:
$ cd ios && pod deintergrate && cd -Now we’re ready to start our renaming process!
Start Renaming React-Native
Since we’re updating the name manually you want to make sure to limit the characters to letters of the alphabet and underscores, but most importantly avoiding special characters like spaces or hyphens.
Once you have decided what to change the name to, we start by updating the highest level files referenced within the JavaScript code itself. Within the app.json and package.json files, we will start our renaming process by manually replacing our old app name with the new app name.
- app.json
- package.json
Once these have been updated, we’re ready to start renaming based on the architecture, which we can do one at a time. We’ll start with iOS since it’s the most involved process. Feel free to skip to the Android section if you want to skip it.
Renaming React-Native iOS
The biggest concern with changing the name in iOS is the project.pbxproj file. In this file the app name is used for many names and file paths references. Using find and replace on this file can cause all sorts of issues. It the long run it’s realistically easier and more full-proof to change these values through Xcode, but the process is slightly involved. Even so, this is often the biggest roadblock for many trying to rename their project.
On that note, let’s start by opening our project workspace file using Xcode. Once open, we want to select the project in the Project Navigator (left panel), and rename the project name to use the new app name. This will automatically rename many some files for us, so we don’t have to.
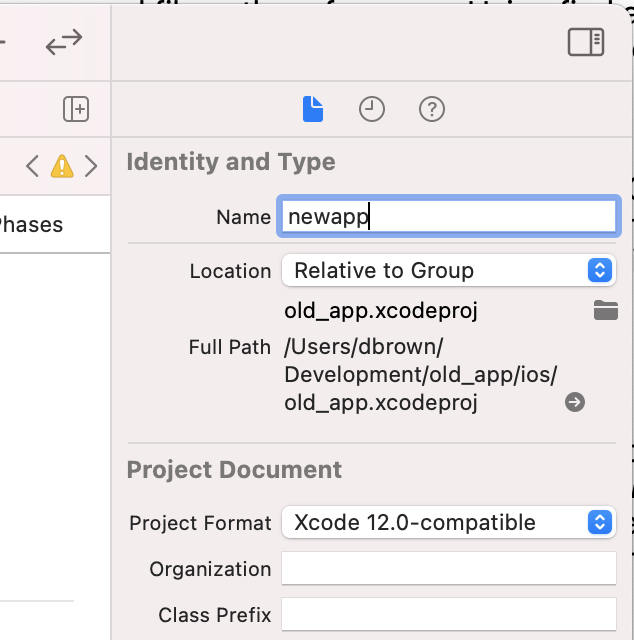
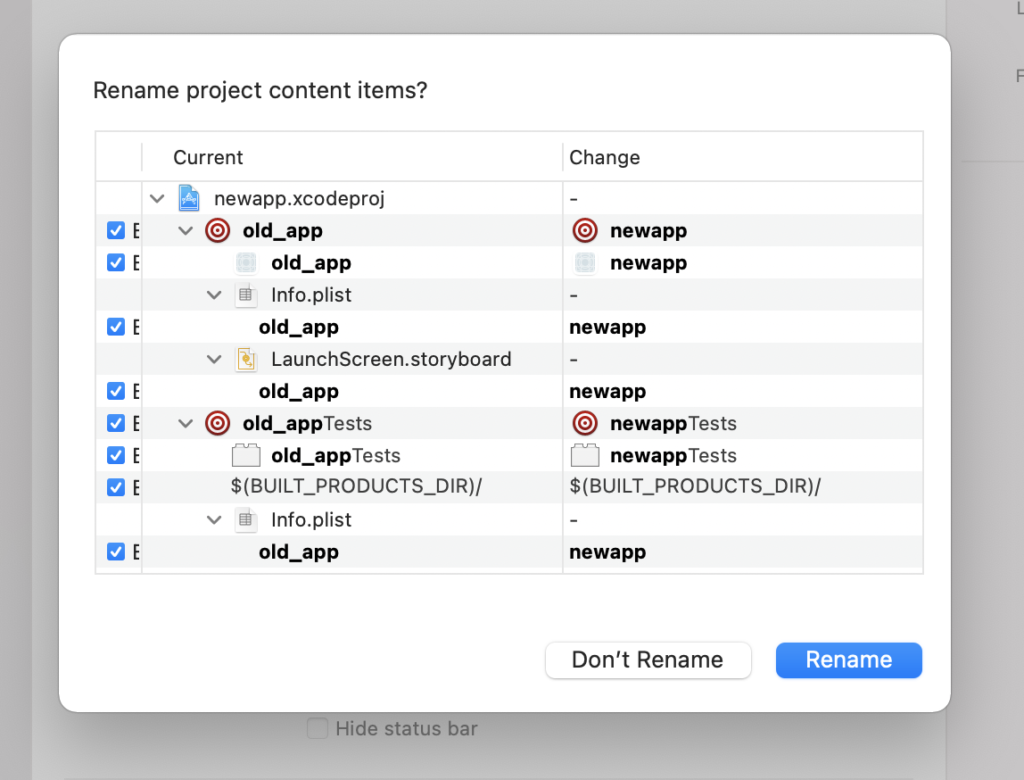
When you change the name and then submit your changes, you will receive a dialog asking if you want to rename the app. Since we do, click rename, and Xcode will automatically rename some other files for you automatically.
Project Folders
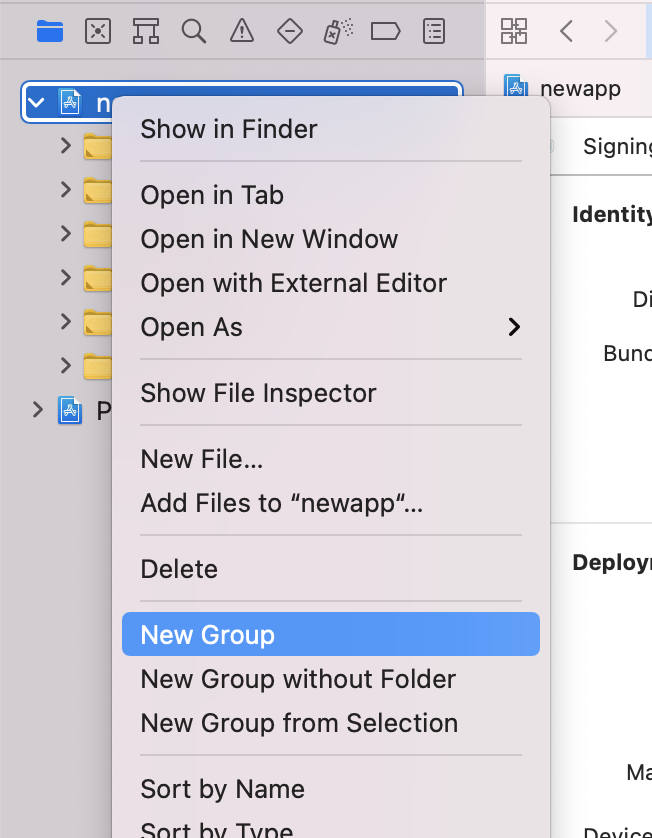
If we open the app_name.xcworkspace file, we have two folders which are based on the app’s name. The first simply being app_name and the second being app_nameTests. Because Xcode is only using references to these folders, changing the name manually really isn’t a good option. So instead, we want to create new folders with our new name to replace these (using Create New Group), then drag-and-drop the old files into their new counterpart folder.
Schemes and Targets
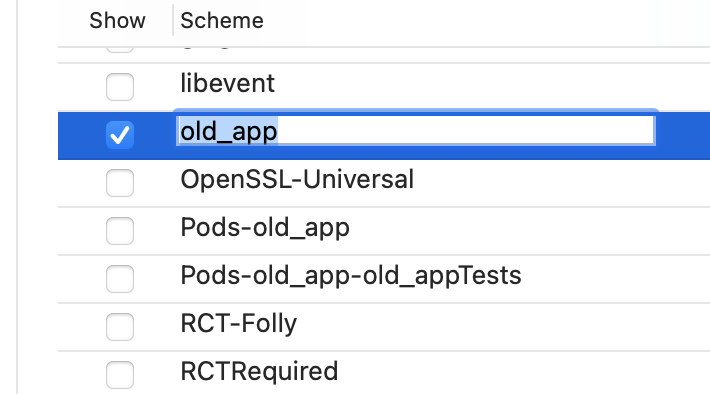
Once the folders are replaced, we want to rename our Schemes. Click on the scheme (to the right of the Build/Stop buttons), and choose the “Manage Schemes…”.
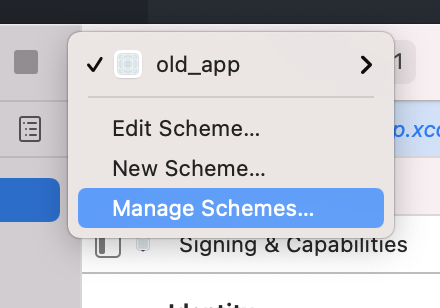
There are 3 Schemes you want to change, so select and rename the following Schemes:
- app_name
- Pods-app_name
- Pods-app_name-app_nameTests
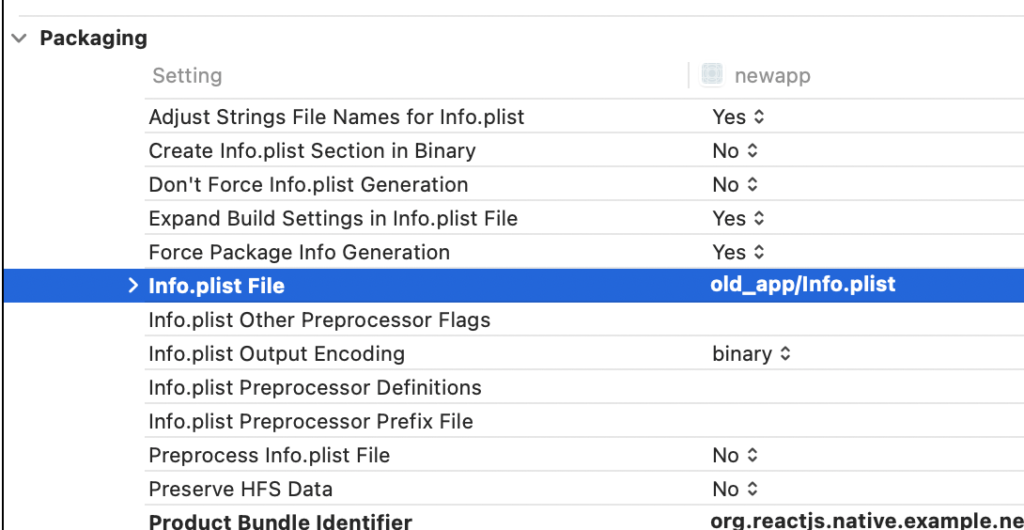
Next we want to update the Target names. Select the Project from the File Inspector, then select the main app_name target. On the right-side, open the inspector and change the name of the target to the new app name. After renaming the target, go into the Build Settings, and then update the location value for the Info.plist File. Now we want to do the same thing with our app_nameTests target.
With our references updated, close Xcode and go into the project’s ios folder. Next, rename the xcworkspace file, and the xcodeproj files to reflect the new project name.
Rename Pods
To start this process, we really just want to update the target names in our Podfile. Most of the Pod section is completely dynamic, so updating the target names will take care of most settings renaming the project target names, the output file, the support files, and all sort of other Pod related files. Once the targets are updated in the Podfile, reinstall the Pods with the updated target names.
$ cd ios && pod install && cd -Find and Replace in these Files
Once we have updated our workspace file, you can do a Find and Replace on the following remaining files.
AppDelegate.m
app_name.xcscheme
app_nameTests.m
Now that everything is done, reopen the workspace folder, select the main Scheme, and build our app.
Renaming React-Native for Android
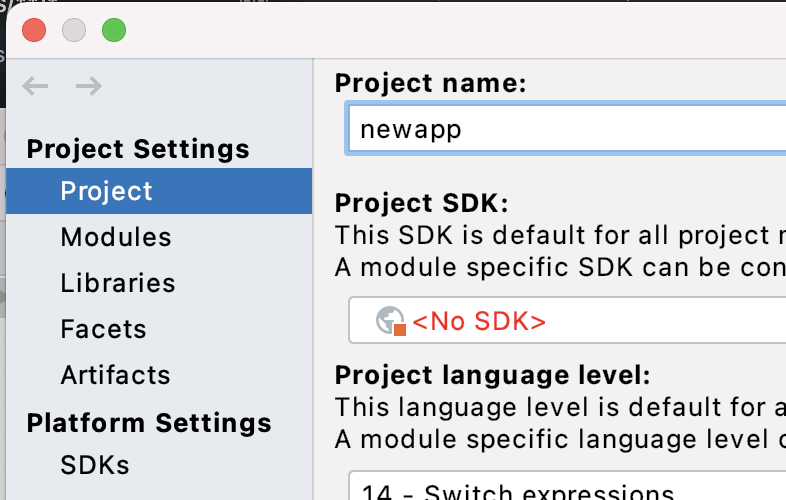
Renaming the Android project is a whole lot easier than the iOS project, mostly due the ability to do a Find and Replace for most settings. Let’s first start by opening the project in Android Studio. Once open, go to File > Project Structure, and change the name from the old name to the new name.
Now we want to update the app’s name in both the MainActivity.java and strings.xml files.
Once you have changed those two files, you should be able to build your project with the new name. Go ahead and test that now. If for some reason it’s not building, review your changes, and make sure nothing else was changed in the process.
Changing the Package Name
Updating the package name is completely optional. If you do update the package name, you will have to reconfigure any services referencing that package name (see next section). If that’s not an issue for you, here are the files you need to change to update the package name:
- android/settings.gradle
- android/app/build.gradle
- android/app/_BUCK
- android/app/src/main/AndroidManifest.xml
- android/app/src/main/java/com/app_name/ReactNativeFlipper.java
- android/app/src/main/java/com/app_name/MainActivity.java
- android/app/src/main/java/com/app_name/MainApplication.java
In each file, update the com.app_name to com.newappname. That’s it!
Remote Services
If you changed the Package name for either platform, you will now need to change the name on your remote services. In other words, anything that relies on the old package identifier will need to be updated, or setup again. For example:
- Google Play Store
- Apple Connect
- Firebase (and associated services)
Once you have updated the name in each one, you’re completely done with your name change.
No Comments